INTRODUCTION:
By default, gridlines don’t appear on a printed worksheet or workbook in Excel 2007. The steps below explain how you can make the gridlines appear in your printed worksheets.
PROCEDURE:
- Select the worksheet(s) that you want to print.
-
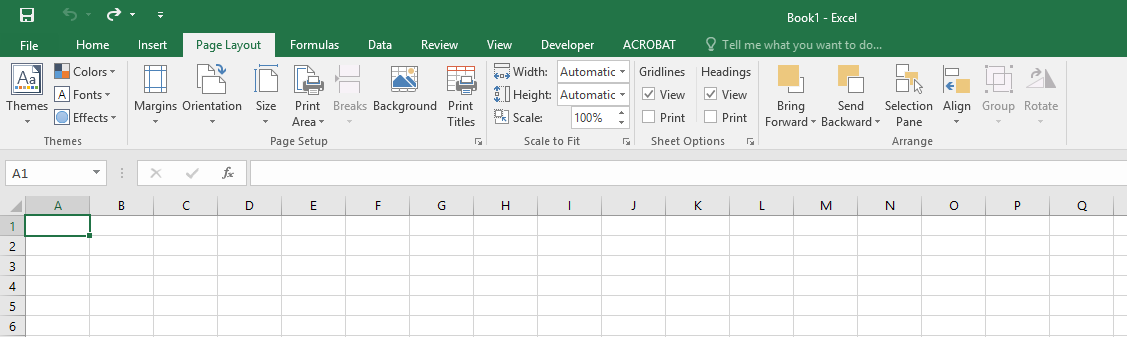
Open the Page Layout tab.
-
In the Sheet Options section of the ribbon, mark the Print checkbox (under Gridlines).
Note: If the checkboxes in the Sheet Options section of the ribbon are grayed-out, it may be because you have a chart, image, or other object selected on the worksheet. If you cancel that selection you’ll be able to use the checkboxes.

- Select File > Print (or press Ctrl+P).
- Click OK in the Print dialog box.
-
Press Ctrl+F2 to open the Print Preview window and see how the gridlines will print.
Note: Gridlines are designed to print only around actual data in a worksheet. If you want to print gridlines around empty cells as well, you must set the print area to include those cells. Alternatively, you can apply borders around the cells instead. To learn more about these options, see Define or clear a print area on a worksheet or Apply or remove cell borders on a worksheet.
If gridlines don’t show up when you print your worksheet—or if you can’t see them in the Print Preview window—make sure that the Draft quality checkbox is not selected. The Draft quality checkbox is found on the Sheet tab in the Page Setup window. To quickly access the Page Setup window, press Alt+P and then S+O.
If gridlines still don’t print successfully then there may be an issue with your printer driver. In this case, try downloading the latest driver from the printer manufacturer’s website. As a last resort, you can manually apply borders around the cells that you want to print (see Apply or remove cell borders on a worksheet).
Comments
0 comments
Article is closed for comments.